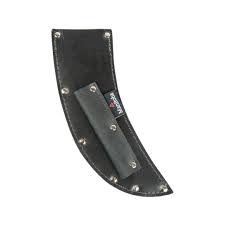
If you’re going to use a curved knife for camp chores, then it’s important that you keep the blade protected. A sheath is a great way to do that.
To make a sheath for a curved knife, you’ll need a leather pattern, leather, a rowel tool, and some sewing supplies. Using these tools, you can make a sheath that will last you for years to come.
Make a pattern
If you’re going to make a sheath for a curved knife, you should make sure it’s well-formed so that your blade fits securely inside. To ensure this, you should trace out a pattern for the sheath and cut it out of a piece of thick paper.
When you’re done, transfer the pattern to a piece of cardstock or poster board. Using this thicker material will provide you with stiffer lines to trace, so it’s a good idea to use a pencil and a ruler to trace the sheath’s shape.
Next, create a 3D model of the sheath in a computer program such as Bryce or Shape Magic. This is the simplest way to make a sheath because you can use it to shape and assemble the leather.
Cut the leather
If you’re a beginner at leatherworking, a leather knife sheath is a great project to start with. It’s a stylish and practical way to protect your blade, and it can be made in your home with just a few simple tools and materials.
First, create a pattern on stiff paper or cardboard. This will serve as a guide to help you determine where the fold of your sheath will be.
Next, cut out the pattern from the paper using a pair of thick scissors. You can also transfer the pattern to a piece of cardstock or poster board for a more sturdy line.
After cutting out the pattern, you can now shape your leather. This is the process of adding thickness to the sheath and ensuring that it fits securely around your knife.
Make the welt
If you want a sheath for a curved knife that protects the knife from damage, it needs to have a welt. A welt is a strip of leather that the knife cutting edge slides against and the sheath front and back sit on top of.
A good welt is often 2-3 times thicker than the sheath front and back. It imparts a lot of stiffness to the entire sheath and adds necessary thickness to accommodate the handle.
It also protects the sheath stitching, lacing, or other assembly components from damage as the knife cutting edge drags against it. This is why sheaths with welts tend to last longer than factory or common sheaths that have thinner, less sturdy leather and no welts.
Sew the sheath
A sheath is a great way to keep your knife secure and prevent it from getting damaged or stabbing you. It also helps keep your blade from getting dull.
To make a sheath, you’ll need a knife and some leather. You can use any kind of leather, but vegetable tanned leather is ideal.
You can also use treated leather, which doesn’t absorb moisture so it doesn’t rot or get dull.
Start by tracing the sheath pattern onto the leather. It’s best to transfer the pattern onto a piece of thicker paper, like cardstock or poster board, for a better-quality trace.
Finish the sheath
A knife sheath is a great way to keep your blade safely stored away from harm. They also add a great look to your knife and protect it from nicks or damage.
Creating a sheath for a curved blade is no easy task. However, the resulting sheath will be worth the effort.
The first step is to form the leather around the blade. It is important to be very careful with this stage as any marks put on the wet leather will remain permanently.
You can use a leather gouge or a knife with a built-in guide to cut a shallow groove into the leather. Then, using a rowel tool, mark six evenly spaced holes in the groove.
